The boring bit, alas! A necessity to get the best from your, trees, good pruning not only controls and shapes the tree to your requirements, it also encourages the production of fruit buds. Trees that aren’t pruned generally take longer to reach productive age and may fruit poorly with lots of lax, unruly growth.
If it all seems a bit dense and complicated, take a good look at your tree[s] and make a start – it soon becomes clearer.
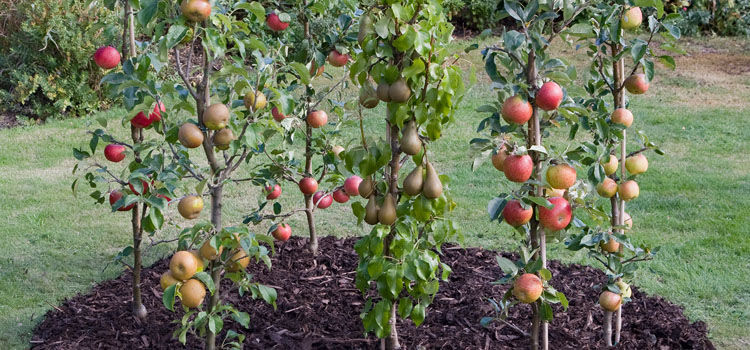
Most pruning of all trained trees is very simple, but read through the following carefully, study the tree, and the meaning will become clear. Once the object of pruning is understood the basic principles are clearly explained. The main objectives are to make sure that branches are well spread to allow in air and light, to build the shape of the tree you require and in later years to remove any dead or diseased wood. Pruning should be carried out in the Winter months between November and February but preferably not when air temperatures are below freezing. The trained shapes known as bush, pyramid and cordons are the most convenient types for normal gardens and these three are listed accordingly.
One advantage is that Apples and Pears are pruned the same, and Cherries, Plums, Peachews, Nectarines and Apricots are also pruned the same so there are really only two pruning methods to grasp.
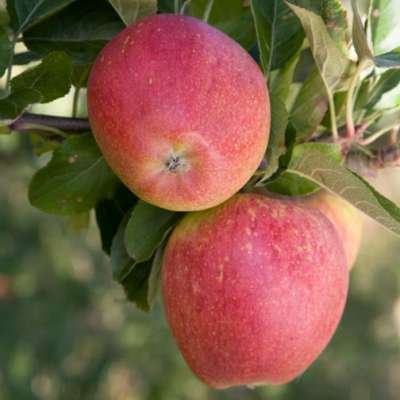
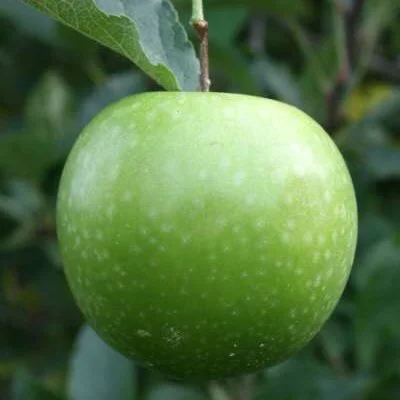
APPLES AND PEARS
PRUNING THE BUSH TREE.
The best natural shape of a tree is a bush. The branches spread from a 2 or 3 foot stem and are easy to pick from and prune.
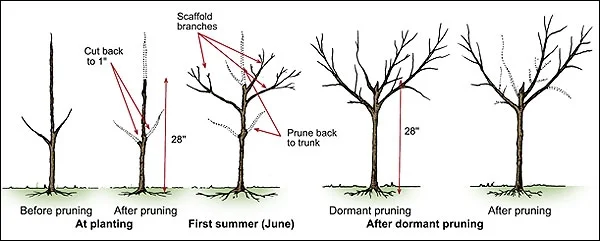
After Planting. Immediately after planting, if the tree is a maiden, the main stem should be cut just above a bud at approximately 3 feet from the ground and any side shoots cut back to just 2 or 3 buds from the main stem. These young side shoots are called feathers, any that are closer to the ground than 2 feet should be removed.
Second winter. Or after planting if the tree is two years old. . There will now be 3 or 4 good wide angled shoots which will become the main branches. Cut each of these back to an outward facing bud, removing about half the length of the shoot.
3rd winter. All of the shoots pruned the previous Winter should have grown a further 2 or 3 good shoots. These should be pruned to a well placed bud removing about a third of the new growth, any shoots that have developed and may cause overcrowding should be removed to maintain the bush shape of your tree. The main framework should now consist of about 8 main branches.
Pruning the now established tree. Your tree is now established and will begin to fruit, from now on the pruning is much more flexible. It is simply a matter of removing any unwanted wood that is overcrowding your tree or restricting light and air to too great an extent. In general, the tips of the braches should not now be pruned unless a branch is growing in an undesirable direction. Every year some side shoots should be left un-pruned to bear fruit, cutting out only those that fruited the previous year to a two inch stump. You will now be understanding the growth of your tree and the results of previous pruning and be in a position to cultivate your fruiting tree to provide your requirements.
PRUNING THE DWARF PYRAMID.
The dwarf pyramid is the ideal easy way of growing apples and pears if room is restricted in the smaller garden or a very intensive system is required. Trees are planted just 5 feet apart for M9 and 6 feet apart for M26 and pears. If more that one row is required the rows should be 7 feet apart. As the name suggests the aim of pruning a dwarf pyramid is to have a central stem of about 7 feet high and a total branch spread of about 4 feet which tapers to the top to form a pyramid shape. This shape is achieved easily with a combination of Winter and Summer pruning. Do not grow dwarf pyramids against a wall, but in the open garden. After planting, the stems should be cut back to about 20 inches from the ground and any side shoots cut to leave 4 or 5 buds, shorter if necessary. During the first Summer, 4 or 5 strong shoots will be produced, no pruning is required at this time.
The 2nd winter. Cut back the central leader to leave approximately 9 inches of new growth, ensuring that you prune at a bud that points in the opposite direction to the last pruning. This ensures that the central stem will remain as straight and upright as possible. The side branches should be pruned to a downward pointing bud to leave approximately 8 inches of the new seasons growth.
The following summer, July/August. Leave all the leaders un-pruned but all the laterals (the current season’s growth) that have grown from trees should be pruned back to about 3 or 4 inches or 3 leaves. Any that are immature leave and prune in September in the same way.
Subsequent pruning. Once again cut back the central leader to about 9 inches ensuring you prune to a bud on the opposite side to the previous Winter. Once the tree has reached the required height of about 7 feet, the leader should not be pruned in Winter but cut back to its origin in Summer. If the growth is vigorous, this can be done in May and further shortened in August.
Every Summer the branch leaders should be pruned to approximately 5 inches and all side laterals to 3 or 4 leaves. Any sub laterals (those growing from the side laterals) should be pruned to 2 leaves.
From now the intention should be to retain the pyramid shape by close pruning and removal of any over vigorous shoots. Dwarf pyramids are easy to manage and all pruning is at a convenient height. The best form for the smaller modern gardens.
CORDONS.
Growing apples as cordons is ideal for the less experienced and the smaller garden and is probably the most productive of all growing systems. Cordons are in fruit the second season after planting and in heavy crop in 4 years. It is possible to grow a large range of varieties in a very small space to ensure excellent pollination and a full season long crop.
After planting cut the main stem to a bud removing about one third, this will often have been done at the nursery, prior to despatch. At planting it is easier to tie the bamboo cane to the support and then tie the stem of the tree to the bamboo cane.
The first summer. As the main stem grows this should be tied to the supporting bamboo to keep it in a straight line, do not prune this main stem. In July or August prune the laterals which have grown from the main stem leaving 3 or 4 leaves on each. Ignore the ring or cluster of leaves at the base of each stem, count from this cluster and cut close to the selected leaves. It is easy to see when your cordon is ready for Summer pruning, the side shoots have grown out to 9 inches or more long, the leaves have become darker and lost their early brightness and the whole shoots have stiffened and begun to look more mature at the base end near the stem.
The following winter. Each Winter prune the new growth of the main stem as before until it has reached the required height at the top of the wires. Each year cut at a bud on opposite sides so that the main stem keeps growing as straight as possible. When the main stem has reached the top of the wire, it should no longer be pruned in Winter but cut back in Summer to the required height.
Summer pruning the established tree. Every Summer at the stage of growth previously described, all of the laterals that are growing from the main stem should be pruned to leave 3 to 4 leaves. Do not prune those less than 9 inches long as these may have fruit buds.
All sub laterals (shoots which grow from previous laterals) should be pruned back to two leaves. If secondary growth occurs in poor growing seasons, prune back to one bud from your earlier Summer pruning in September. All of this may sound drastic and complicated but it is not, it is essential and easy, so easy in fact that it has been known in large areas of professional trials to Summer prune with hedging shears. We ourselves still prefer the traditional method!
Pruning mini M27 cordons. Prune as with the larger rootstocks except that pruning should not be quite so hard. Light pruning with most varieties is sufficient.
PLUMS AND CHERRIES
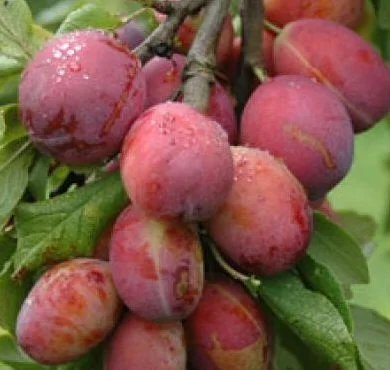
All pruning should be done in the Spring or early Summer, to avoid infection of silver leaf disease. But winter pruning can be unavoidable in some circumstances. If silverleaf has been a problem locally then paint main cuts with arbrex or similar.
Plums and cherries can both be grown in a natural shape with very little pruning. Leave the tree almost entirely un-pruned until it settles down to fruiting, just remove the odd branches that re overcrowding the tree, if any. If you require more laterals that are produced naturally, simply shorten some of the side shoots, In later years just prune to keep the tree tidy, preferably in Summer (July).
THE DWARF PYRAMID.
This is by far the best trained form for plums and cherries if you require your tree to remain an easily manageable size. Plums can even be grown in a fruit cage using this method and all trees are easily netted from birds, which is very important with cherries. After planting the tree it can be left until the Spring and as growth starts the main stem should be cut back to 4 feet from ground level. This may have been done at the nursery before despatch. During the Summer, usually in late July, all of the new side branches should be shortened to about 8 inches, pruning to a downward pointing bud, the leader (main stem) should be left un-pruned. If the side shoots appear too close together, remove some completely to leave a well shaped tree. All shoots below 18 inches from the ground should be completely cut off.
Following Spring & future seasons As growth starts in the Spring, the leader should be cut back by about half to two thirds of the new growth, pruning to a bud the opposite side to the previous year’s pruning. In future years when the tree has reached the required height of 8-9 ft the leader should be cut back in May to control at this height. In Summer each year all of the current season’s growth of each branch should be shortened to about 8 leaves, all laterals growing from these branches should be pruned to 6 leaves, any vigorous shoots near the top of the tree should be cut out.
Your tree is now maintained in an easy to manage heavy cropping form. Rootstocks At Julian A and pixy for plums are both ideal for this culture as is Colt for cherries.
THE FAN TRAINED TREE. It is normally best to train your own fan trained tree if you require this form to grow against a wall or fence. By training your own tree, the end result is a tree to meet exactly your conditions and requirements.
After planting: Plant a maiden tree and the first Winter prune to 12 to 28 inches above the ground. This should be done as growth starts in the Spring, or sometimes in late Winter. In the first Summer choose five good shoots and tie them to the wall or wires, spreading them out so that the top one is vertical and the lowest two horizontal, with the remaining two evenly spaced between them to form the basic fan.
The following Spring. Prune all five shoots hard by cutting back half to three quarters of the growth.
2nd summer. You should now select on average 9 to 10 shoots and tie them equally spaced as before. All weak shoots that are not needed for branches should be pruned to 5 or 6 leaves.
3rd spring The branches should be all pruned by removing a quarter to a third of the past season’s growth.
General Summer pruning. In July as the new shoots are made, the growing point should be pinched out after 6 or 7 leaves. Any that are required for further training should be left. After cropping, between mid August and mid September, the shoots that you have pinched out should be pruned back further to leave 3 leaves to encourage the growth of fruit buds at the base for the following year. When your fan has covered your wall to your satisfaction, the growth that reaches the top wall should be cut back to a weaker lateral just below, in July.
Peaches, Nectarines & Apricots
Pruning is the same as descrivbed for Plums and Cherries.
COLUMNAR FRUIT TREES
The same basic method suits all fruit trees grown as columnar.
A Supercolumn is a specially selected tree that comes to you ready for planting. Some trees have short fruiting spurs that have been pruned back, other trees, will have none at all, and are straight columns with quality fruit buds. At the time of planting the form varies with the variety chosen. After the first year, all trees look alike and grow in a similar manner. Plant the tree as it is when it arrives. You do not have to reduce the height unless you wish to. Prepare the soil as detailed in the culture guide for fruit trees. The trees will need staking throughout their life for the best results but this does not have to be a large post. A normal rose stake or a reasonable thickness 6’ bamboo cane is quite adequate unless your growing area is very exposed. As the trees grow during the Summer you will find that small side shoots are produced. If you leave these they will grow into branches so they must always be pinched back to maintain the simpler columnar form. This simple pruning is always carried out in the better Summer months and you will normally start in late June in the south of the country or July in the north. If you watch the trees from June onwards it is soon obvious what has to be done. Once the new side growths are 9-12” long they need your attention. You can pinch the soft shoots out with your finger and thumb or use secateurs. Shorten the new growths back to about 4-5” cutting just above the bud. That is all that has to be done. Any shorter growths that are less than 9” are left until next time. It is best to check your trees about every three weeks until the seasons growth has finished in the early Autumn. Always try to shorten the growths to about the same length and this will maintain the perfect column. If fruits are produced the first Summer after planting there is no need to remove them as you would with an ordinary tree. Supercolumns are capable of fruiting from the first year and usually settle down for regular, heavy cropping, from the second year onwards. Full cropping is often achieved by the fourth year.