Redcurrant planting
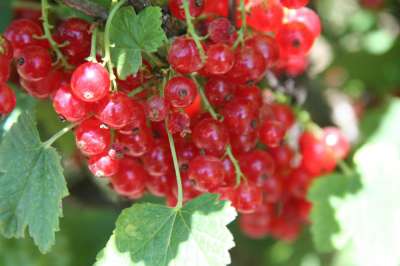
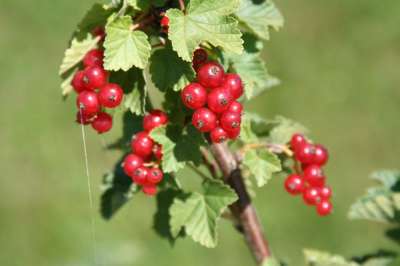
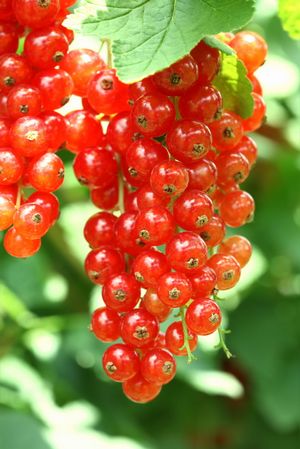
The essential component of any well stocked fruit garden and the epitome of summer, the dangling jewel-like strigs of sparkling redcurrants – together with the mother-of-pearl like sweeter whitecurrant – are a classic ingredient for summer fruit puddings, adorning summer cocktails, and making jars of vividly flaoursome jams.
View our online catalogue of Redcurrant bushes.
Cultivation is not difficult provided a few simple pointers are followed bushes can crop well for up to 15 years and there are also smaller growing options if you are restricted for space.
Read this article and in no time at all you will have happy currant bushes in your garden just waiting to reward you with their bounty. Have the freezer at the ready for any excess. The first must-have is for a nice sunny spot. Unlike their close relations, the blackcurrants, these fruit bushes won’t tolerate a deal of shade, or at least they will probably exist or even grow there, but seldom produce a lot of fruit. Afford them some nicely warming sunshine for good results.Soil.
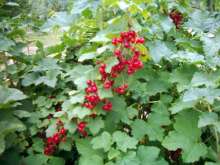
Redcurrant and whitecurrants are tolerant of quite wide ranging conditions but avoid poor drainage. As far as ph is concerned they prefer to be neutral to slightly acid, but this is only a preference. As long as the soil has good drainage but isn’t too thin or dry then your new bushes should thrive. They need space they can call their own and air and light around them so make sure you can allocate sufficient space between the bushes. Bushes should be grown in the open but cordons [more of which later] will need support and are commonly grown against a wall or fence.
Redcurrants and whitecurrant bushes can be grown in association with blackcurrants with no problems.
Soil preparation & planting for redcurrant and whitecurrants
For the best results prepare the soil in late summer or early autumn for planting over winter. Double digging is necessary for most area’s unless it is already well cultivated. In any case the soil should be nicely friable and not too dry; if it has been under dense vegetation for a while then irrigate it freely immediately after cultivation so it is nicely moist when it comes to planting.
Rigorously remove all weeds I including any detatched roots you find from pernicious species. Your new bushes will not want to have to withstand the competition of excessive weed growth and next spring weeds will come back stronger than ever, especially if the area hasn’t been turned for a while, you will have those newcomers to deal with anyway so get the area as nicely clean as you can from the outset. Another option is to lay plastic sheeting down, pegged at the edges with sticks or pebbles to weight it down, or you can dig the edges into the soil using a shallow trench. You can cut a slit into the plastic and plant the bushes through it. But it doesn’t look very attractive and sometimes you will need to water the new bushes more because rain cannot permeate the plastic and get through to the roots.
The soil should be nice lt fertile – that is well fed, from the outset. To achieve this goal a dressing of a suitable fertilizer should be made immediately after digging or rotovating has taken place. Most of the proprietary granular fertilizers are suitable, a goods NPK fertilizer is ideal if not growmore or bonemeal or blood, fish & bone will all do the trick. 2 ounces per square yard is a sensible application. In addition a light dusting of potash is very beneficial to redcurrants and whitecurrants too. Having dug over and fed the ground a covering with some organic rich material is important as this will suppress further weed growth and also retain moisture and nutrients. It also encourages the beneficial activities of worms. Bark chippings, garden compost, well rotted manure [beware the source, it must be aged] or even sawdust can all be used to good advantage. This should be spread around 1” deep over the planting area, that’s a little less deep than for blackcurrants which tend to be more shallow rooted.
A bare root currant bush will come to you lifted straight from the nursery bed or field. It won’t have soil around the roots and will be quite light and easy to handle. The roots will normally be in a polythene bag to stop them drying out and this should be maintained at all times until the bush is in the ground. If you cannot plant straight away examine it on receipt and if at all dry, soak the roots in water and again prior to planting. Leave the bag on the roots and keep in a cold place such as a shed or outhouse. Only remove the bag just prior to planting. You can buy good quality Redcurrant bushes all year round. The planting hole must be big enough to take the roots comfortably. Don’t try to make do with a hole that is too small as the roots resent being cramped. Set the bush so the soil level from before, which should still be clearly identifiable on the main stem, is the set level with soil surface now. Fill in the friable topsoil and firm it down well. Water the bush in, wait for the soil to settle and then top up so the planting area is level with the surrounding ground. You will find after the first watering the ground will often sink again and you don’t want the new bushes sitting in a hollow where water can collect over winter.
Your new bushes are now happily settled into their new home awaiting the spring when they will burst forth into new growth.
Container grown bushes can often be purchased during the growing season [that is late April to September] and these represent a convenient method of transplanting them outside of the ‘normal’ season which would be Autumn and winter. The principals of planting from a container are the same but you only need to prepare a hole the same size as the container, so the rootball sits in it’s new hole comfortably. Examine the rootball before you set it. It will depend on how long the bush has been potted, if it was containerised that spring then you will need to be careful not to disturb the root system as the compost may be a bit lose. But if you bush was potted the year before extensive new root growth will have filled the pot and you will need to tease some of that out to get new roots establishing as soon as possible.
The main difference between planting bare root bushes in the Autumn and Winter, and pot grown bushes when it is warmer, is that of watering. A bare root bush is ‘asleep’ and it doesn’t have any immediate requirements. The only reason it is suggested that you water this type of bush in after planting is to settle the soil, other than that it wouldn’t be necessary at all because the bush isn’t doing anything as such. Pot grown and containerised bushes are a different proposition because they are already in growth and have leaves and stems to support with a regular supply of moisture and nutrient. If this isn’t given to them adequately then that is when these new shoots and leaves start to wilt and may even die because the bush doesn’t have an established root system to support it. Regular and heavy watering is essential to wellbeing under these circumstances and I can’t emphasis the ‘heavy’ enough.
Too often I have seen inexperienced gardens wafting around with a small watering can, rose intact, sprinkling the water briefly over the top of the plant and thinking that’s enough. It isn’t! Remove the rose or sprinkler if you have to use a watering can at all, better still get the hose pipe and use that direct. Apply water to the base of the plant around the roots – that’s where it’s required, at soil level. Watering over the top of the plant is useless because a lot of it doesn’t reach the soil at all and simply evaporates from the foliage in a matter of minutes. You want to puddle the new bushes in – a term used to signify leaving the hose in place for up to 1 or 2 minutes until the water floods the planting area and begins to spread out. Only when this happens have you given enough – next move on to the next bush. This water regime should be practiced twice a day for the first 2 weeks, and one a day after that until the new bushes show strong new growth, signifying that they are now well established in their new home. The early morning and the evening are the best times to water, always.