Your basket is currently empty!

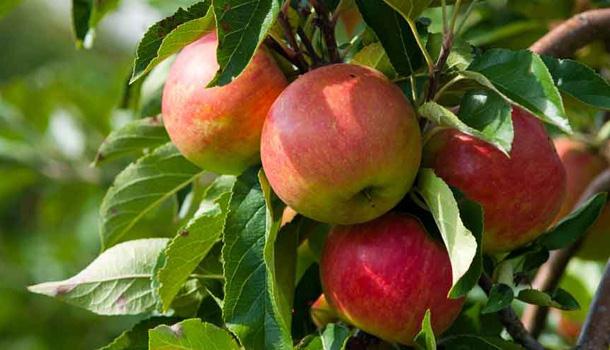
How to grow apple trees
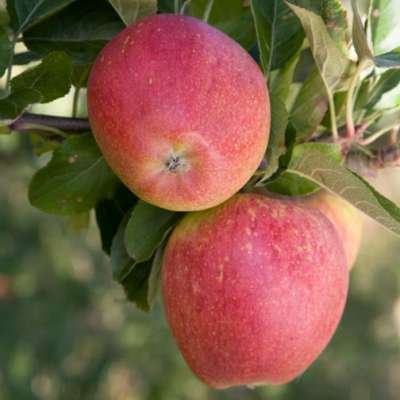
Pollination & choosing apple trees
When you are selecting the varieties you wish to grow, many criteria will come to the fore. Suitability for your area, season of cropping, hardiness, disease resistance etc.
But possibly the most important aspect of all is that of the flowering season – not all varieties flower at exactly the same time you see, and you need to make sure they do because the majority of varieties are not self-compatible. That is why it is always best to plant in pairs at least because then you can choose two that ‘go’ together for pollination purposes.
Nursery catalogues and websites have developed a system where each variety is given a letter or number prefix. The variety Lord Lambourne for example is known as an ‘A’ – or ‘1’ pollination group which is the first, earliest flowering group. It will only go with other varieties in the same group because these are the ones that flower at the same time.
So how to grow apple trees?
If you grow it on it’s own it will never have worthwhile fruit and if you plant it with another that is too late flowering it still won’t have anything on because there will be no viable pollen around at the right time to set the flowers. It is a fairly simple procedure to select varieties in the same group and it is then a safe bet they will be happily compatible.
If you can only plant one tree then make sure you choose from the list of varieties known to be self fertile. There aren’t many varieties that are so your choice will be much more restricted. Going back to those pollination groups, it goes A,B,C and D, or 1,2,3 and 4. A’s and number 1’s are the earliest group and D’s and number 4’s are the latest to open.
When siting your new trees, you do not have to worry about them being right next to each other to pollinate, they can be several yards away and the bees will still do their work, a certain amount of pollen may be carried on the wind as well.
Pollination can further be augmented by the presence of ornamental crab apple trees. These can really help a crop and will influence the fruit-set and often make for better quality resultant fruits. I wouldn’t rely on them solely to act as pollinating partners ‘though.
The apple trees varieties John Downie, Golden Horner and Evereste are not to be particularly good pollinators and their fruits can be used for making crab apple jelly. They don’t have to be growing right beside the apple trees themselves, as long as they are reasonably nearby.
How to plant apple trees
So you’ve digested all the various growing forms and rootstocks, you have sharpened your spade and now you’re ready for the exciting bit – planting your new trees! A bit of necessary hard work comes first – you need to prepare the soil really well for the best results.
If you cannot plant your bare-root trees straight away, you can ‘trench’ them in as a temporary measure in a sheltered corner.
Simply dig a shallow trench deep enough to take the roots, lay the trees in the trench at an angle and backfill making sure the roots are quite covered with damp soil. This will keep them indefinitely until you are ready to plant [They must be planted properly before they bud up in the Spring] Container grown trees can be kept as long as you need them to, as long as they are kept well watered in the interim.
One of the most important things to do at this stage is to remove all weeds, be it perennial or annual. If this can be done a few weeks in advance, then it will allow for secondary weed growth to come through wherever the soil has been disturbed. You can use herbicides if necessary and it will still be safe to plant a few weeks later.
You don’t need to cultivate all of the ground allocated for your new ‘orchard’ but you do need to prepare individual spots for the trees, spaced appropriately for the rootstock or type of tree concerned. For this, prepare a hole about 24” across and remove the soil to a similar depth. Break it up until finely tilled, mix in some compost or leafmould and a small handful of bonemeal or growmore.If preparing the holes in advance replace it into the hole; it does not matter if is now higher than the existing ground because it will inevitably settle over a few weeks, even more so if there is heavy rain.
Planting bare-root trees
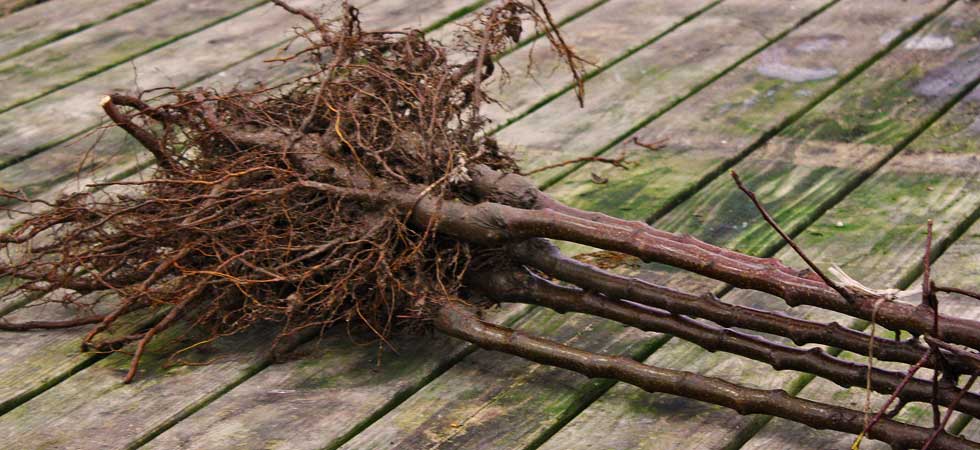
When to plant apple trees?
Planting your new bare root trees will inevitably take place during the dormant period of winter to early Spring. Prepare the hole and make sure it is big enough to take the roots without bending or cramping them. If you have any long tap roots on the trees when you receive them, some can be shortened or even removed for convenience of planting.
Se the tree on a small mound od earth inside the hole and backfill with the topsoil you prepared as described previously. Firm down very well, you do not want any air pockets around the roots when you have finished as this may cause the roots to dry out beneath the soil. When you have finished the uppermost roots of the tree should ideally be 2-3” below the soil.
Next water in quite well, even if it is during the winter. This will settle the soil around the roots. When the water has drained away, the soil will probably have sunk – now you can make it up again with more top soil or compost, so it is the same level as the surrounding ground, or a little higher. There should be no need to water further until the Spring and only then if it is dry.
Make sure there isn’t a ‘sump hole’ that can collect water around the tree. Drive a stake into the ground to support the tree. This is necessary in more exposed and general situations. In enclosed garden settings, and for small trees, it may not be necessary.
You can use a 2 x 2” hardwood post of around 48” in length. Make sure it is treated so it does not rot away too soon.
And finally place a spiral tree guard around the trunk of the tree to deter rabbits, squirrels and deer from damaging the trunk.
Planting container grown trees
The principal is just the same but you will need to make sure the hole is a few inches larger than the rootball. This will allow for the preparation of friable topsoil mixed with fertilizer as described for bare—rooted trees above. Fill in the excess space with this soil and firm very well. The existing rootball should be just level with the top of the soil, or very slightly below.
As this type of tree will probably be set during the growing season, and the tree will have growth to support, it is essential that copious quantities of water are given twice a day for the first 2-3 weeks or until established, and thereafter during prolonged dry spells or periods of stress.
The best time to water is early in the morning and again in the evening. Use a hosepipe wherever possible, or a watering can with no rose. You want a good puddle when you have finished, not an airy-fairy waft with a mister or a slight sprinkling with the watering can rose!
Aftercare
As a matter of course check the tree guards to make sure they are intact, strong winds can dislodge them and extra-hungry bunnys [aren’t they cute] have been known to ‘worry’ at them and try to pull them off so check them and make sure all is ok and replace if necessary. I have seen enough young trees completely savaged by these trees over the years to make it a bit of an obsession for me! Playing ‘Bright Eyes’on repeat and at full volume during the night when they are most active has been known to put them off…..
Watering of newly planted or non-established trees should continue the first spring and summer after planting, if it is dry, following the same principal of a good soaking either early in the morning or in the cool of the evening. Applying a mulch with organic matter, peat, leafmould or mushroom compost helps conserve moisture and also attracts worms which will help break down the soil and availability of nutrients.
Make sure the immediate area surrounding the trunk is kept clear of grass and weeds. Grass can be allowed to grow back towards the end of the first full season following planting, if desired.
Pruning apple trees
Pruning is the same whether your trees are dwarfing or semi dwarfing, or vigorous. The principles remain unchanged, however, if you are growing dwarf rootstock trees then necessary pruning may be on the lighter side.
This is a very important issue because trees that are not pruned, pruned incorrectly will be delayed in their cropping, and may be poorly shaped. You are pruning to maintain a shapely tree true to your desired form, but you also prune to encourage the right form of growth that will carry flowers and later fruit.
If it seems daunting at first don’t be put off, print this article off and take it out with you together with the secateurs and make a start. You will soon gain more of an understanding of what you are doing & everything will follow on from there. The procedure for pruning apples is actually the same as for pears, but quite different to cherries and plums [stonefruit]
PRUNING THE BUSH TREE. The best natural shape of a tree is a bush. The branches spread from a 2 or 3 foot stem and are easy to pick from and prune.
FIRST WINTER. Immediately after planting, if the tree is a maiden, the main stem should be cut just above a bud at approximately 3 feet from the ground and any side shoots cut back to just 2 or 3 buds from the main stem. These young side shoots are called feathers, any that are closer to the ground than 2 feet should be removed.
SECOND WINTER. 2 year opld trees: Or after planting if the tree is two years old. . There will now be 3 or 4 good wide angled shoots which will become the main branches. Cut each of these back to an outward facing bud, removing about half the length of the shoot.
THIRD WINTER. Three year old trees: All of the shoots pruned the previous Winter should have grown a further 2 or 3 good shoots. These should be pruned to a well placed bud removing about a third of the new growth, any shoots that have developed and may cause overcrowding should be removed to maintain the bush shape of your tree. The main framework should now consist of about 8 main branches.
PRUNING THE ESTABLISHED TREE. Your tree is now established and will begin to fruit, from now on the pruning is much more flexible. It is simply a matter of removing any unwanted wood that is overcrowding your tree or restricting light and air to too great an extent. In general, the tips of the braches should not now be pruned unless a branch is growing in an undesirable direction. Every year some side shoots should be left un-pruned to bear fruit, cutting out only those that fruited the previous year to a two inch stump. You will now be understanding the growth of your tree and the results of previous pruning and be in a position to cultivate your fruiting tree to provide your requirements.
PRUNING THE DWARF PYRAMID. The dwarf pyramid is the ideal easy way of growing apples and pears if room is restricted in the smaller garden or a very intensive system is required. Trees are planted just 5 feet apart for M9 and 6 feet apart for M26 and pears. If more that one row is required the rows should be 7 feet apart. As the name suggests the aim of pruning a dwarf pyramid is to have a central stem of about 7 feet high and a total branch spread of about 4 feet which tapers to the top to form a pyramid shape. This shape is achieved easily with a combination of Winter and Summer pruning. Do not grow dwarf pyramids against a wall, but in the open garden. After planting, the stems should be cut back to about 20 inches from the ground and any side shoots cut to leave 4 or 5 buds, shorter if necessary. During the first Summer, 4 or 5 strong shoots will be produced, no pruning is required at this time.
THE SECOND WINTER. Cut back the central leader to leave approximately 9 inches of new growth, ensuring that you prune at a bud that points in the opposite direction to the last pruning. This ensures that the central stem will remain as straight and upright as possible. The side branches should be pruned to a downward pointing bud to leave approximately 8 inches of the new seasons growth.
THE FOLLOWING SUMMER, JULY TO AUGUST. Leave all the leaders un-pruned but all the laterals (the current season’s growth) that have grown from trees should be pruned back to about 3 or 4 inches or 3 leaves. Any that are immature leave and prune in September in the same way.
THE THIRD WINTER AND SUBSEQUENT PRUNING. Once again cut back the central leader to about 9 inches ensuring you prune to a bud on the opposite side to the previous Winter. Once the tree has reached the required height of about 7 feet, the leader should not be pruned in Winter but cut back to its origin in Summer. If the growth is vigorous, this can be done in May and further shortened in August.Every Summer the branch leaders should be pruned to approximately 5 inches and all side laterals to 3 or 4 leaves. Any sub laterals (those growing from the side laterals) should be pruned to 2 leaves.From now the intention should be to retain the pyramid shape by close pruning and removal of any over vigorous shoots. Dwarf pyramids are easy to manage and all pruning is at a convenient height. The best form for the smaller modern gardens.
PRUNING CORDONS. After planting cut the main stem to a bud removing about one third, this will often have been done at the nursery, prior to despatch. At planting it is easier to tie the bamboo cane to the support and then tie the stem of the tree to the bamboo cane.
THE FIRST SUMMER. As the main stem grows this should be tied to the supporting bamboo to keep it in a straight line, do not prune this main stem. In July or August prune the laterals which have grown from the main stem leaving 3 or 4 leaves on each. Ignore the ring or cluster of leaves at the base of each stem, count from this cluster and cut close to the selected leaves. It is easy to see when your cordon is ready for Summer pruning, the side shoots have grown out to 9 inches or more long, the leaves have become darker and lost their early brightness and the whole shoots have stiffened and begun to look more mature at the base end near the stem.
FOLLOWING WINTERS PRUNING. Each Winter prune the new growth of the main stem as before until it has reached the required height at the top of the wires. Each year cut at a bud on opposite sides so that the main stem keeps growing as straight as possible. When the main stem has reached the top of the wire, it should no longer be pruned in Winter but cut back in Summer to the required height.
SUMMER PRUNING THE NOW ESTABLISHED TREE. Every Summer at the stage of growth previously described, all of the laterals that are growing from the main stem should be pruned to leave 3 to 4 leaves. Do not prune those less than 9 inches long as these may have fruit buds.All sub laterals (shoots which grow from previous laterals) should be pruned back to two leaves. If secondary growth occurs in poor growing seasons, prune back to one bud from your earlier Summer pruning in September. All of this may sound drastic and complicated but it is not, it is essential and easy, so easy in fact that it has been known in large areas of professional trials to Summer prune with hedging shears. We ourselves still prefer the traditional method!
Subsequent feeding
You should apply fertilizer ideally to an area of soil correspondent to the size of the top growth. If your trees are growing in grass then the fertilizer can be brushed into the grass. If it is not then rake it into the soil lightly.Potash is a good fertilizer to apply, and early Spring is the time to do it. A rate if a bout three quarters if an ounce to a square yard is appropriate. Sulphate of ammonia can be applied additionally during February, applied at 1oz per square yard.It is often recommended that cooking apples receive more sulphate of ammonia than dessert varieties and the rate of application can be increased by 50-75% if necessary.
Storing apples
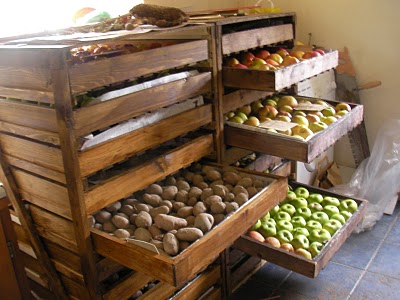
To make the most of your endeavours it will be necessary to make sure all aviable sotring fruits are put to good use and kept in as good a condition as possible. To do this provision should be made in a shed or a garage. Smaller amounts can even be kept in a refrigerator.
Before storing them the fruit should be clean so wipe them over with a slightly damp cloth to remove dirt and bird you-know-what. Try to avoid using windfalls for storing purposes, no matter how tempting that may be. They make look ‘perfect’ but they will almost inevitably be bruised and they will rot in store and contaminate other perfect fruits layed next to them. This applies to all the fruits you plan on storing. Examine them all and if there are any blemishes or bruises reserve them and use them for freezing, cooking and chutney. You should only ever try to store perfect fruits.
Make sure they are dry, remove any leaves and arrange them in layers, just touching. They should be laid in trays covered with newspaper or tissue paper. They must be in a frost free environment but no more than that and the cooler they are kept the longer they will last. Examine them weekly and if any start to rot then remove them immediately. Only try to store varieties that you know will actually store! There is no sense in trying to keep mid season varieties for any longer than a few weeks as they will simply turn to rubber or go off.
Our Shop
-
 Captain Kidd Apple Trees£21.90 – £21.95
 -
 Granny Smith Spur Apple Trees£20.80 – £27.95
 -
 Apple Norfolk Apple Pie Cooking Apple£24.95 – £27.95
 -
 Ballards Seedling Apple Tree£22.20 – £27.95